How to Install Interactive Agent in Linux
Steps to Install Time Champ V3 Interactive Version in Linux System.
Step 1: Log in to your Time Champ account using your credentials.
Step 2: To install the application, click on “Download Agent.”
Step 3: Select the operating system of your computer.
Step 4: Choose the installation type:
To install yourself – Select this option if you want to install the application on your own system.
To install for employees – Select this option if you want to install the application on your employees’ systems.
 The installation file for employees can be shared to the user's system after downloading it from your system.
Step 5 (Linux> To Install for Employees):
In the interactive version, employees can see the tracker running on their systems directly and can pause or continue the time on tracker
Step 6: Choose the mode of installation:
Manual – You need to share the username and password with employees to log in to the application.
Automatic – No credentials are required. The user account will be created automatically based on the system’s logged-in username.
Step 7: Accept the condition to Install.
Check the box “I understand all the above” after reading the important note carefully and click on “Download.”
Do not change the filename otherwise the installation will encounter issues and ensure the required paths are excluded from antivirus.
Step 8: Unzip the Time Champ file

You will see a ZIP file in your Downloads folder.

 Note: Do not change the filename and keep the file in the Downloads folder only and ensure there are no duplicate files with similar names.
Unzip the TimeChamp.zip file.

Open the Time Champ folder. Inside, you will find two files:
License.txt
timechamp-linux_64bit-setup.bash
Step 9: Open the terminal
Open a Terminal window from the same TimeChamp folder path.
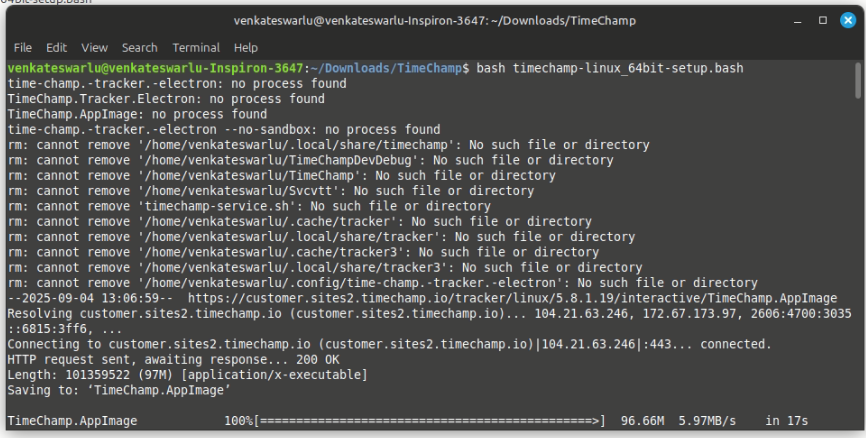
Step 10: Run the installation command
Run the following commands to install the application:
chmod 777 timechamp-linux_64bit-setup.bash
./timechamp-linux_64bit-setup.bash
Step 11: Verify installation
To ensure that the tracker is running successfully:
Open System Monitor and confirm that the tracker process is active.
Log in to your Time Champ Admin Dashboard and verify that the user (based on the system username) appears as Online.
Related Articles
How to Install Interactive Agent in Windows
Step 1: Log in to your Time Champ account Step 2: Click on “Download Agent” to begin the installation process. Step 3: Choose the operating system of your computer (Windows). Step 4: Install Yourself – Select this option to install Time Champ on your ...How to Install Interactive Agent in MAC
Steps to Install Time Champ V3 Interactive Version in MAC System. Step 1: Log in to your Time Champ account using your credentials. Step 2: To install the application, click on “Download Agent.” Step 3: Select the operating system of your computer. ...How to Install Silent Agent in Linux
Steps to Install Time Champ V3 Silent Version in Linux System. Step 1: Log in to your Time Champ account using your credentials. Step 2: To install the application, click on “Download Agent.” Step 3: Select the operating system of your computer. Step ...How to Install Silent Agent in Windows
Step 1: Log in to your Time Champ account Step 2: Click on “Download Agent” to install the application. Step 3: Select the operating system of your computer. Step 4: Choose the installation type: To install yourself: Select this option if you want to ...How to Install Silent Agent In MAC
Steps to Install Time Champ V3 Silent Version in MAC System. Step 1: Log in to your Time Champ account using your credentials. Step 2: To install the application, click on “Download Agent.” Step 3: Select the operating system of your computer. Step ...