Interactive Configuration Settings
Step 1:
Log in to your Time Champ account.
Under the Administration module, navigate to Configurations.
Interactive Settings
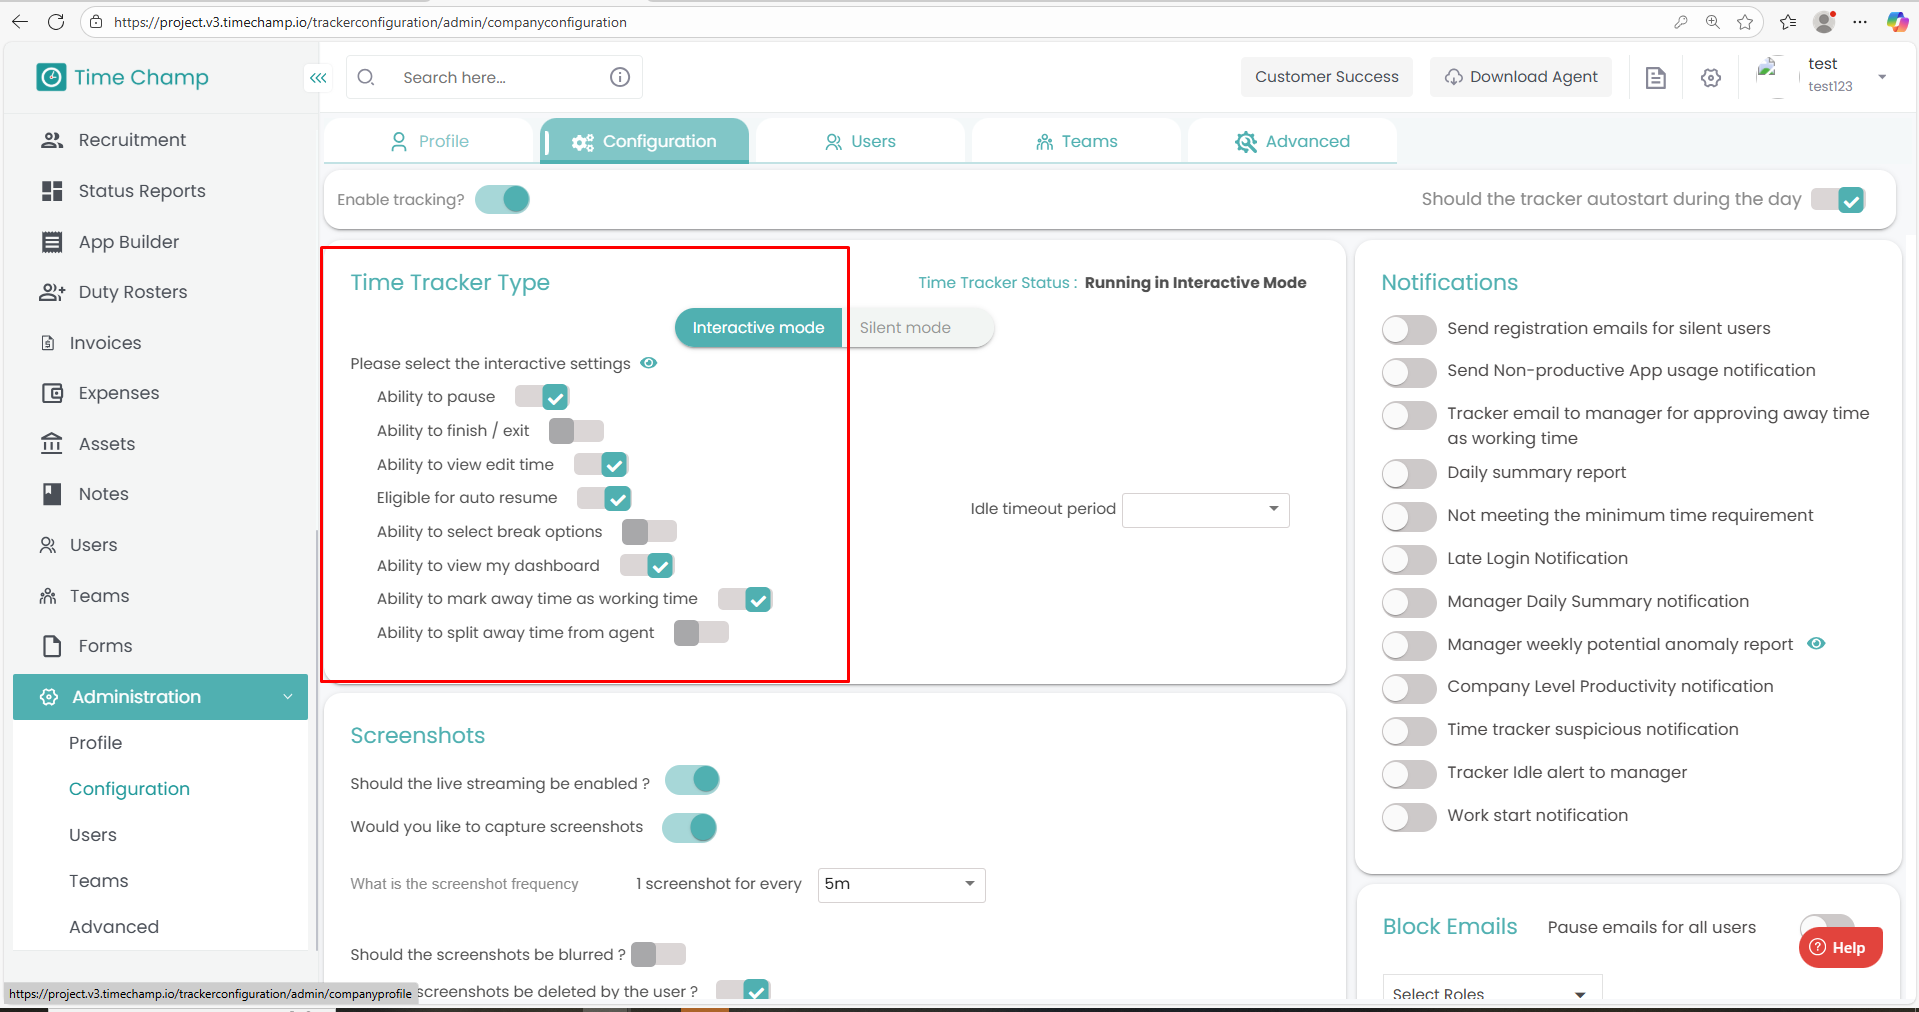
The following options control how employees can interact with the tracker:
-
Ability to Pause
Allows employees to pause the tracker whenever needed. -
Ability to Finish / Exit
Grants employees the option to finish or exit the tracker manually. -
Ability to View/Edit Time
Enables employees to access the “Go to Edit Time” option.
By clicking this, they will be redirected to the Attendance section in their User Dashboard, where they can edit their time. -
Eligible for Auto Resume
Allows the tracker to automatically resume tracking after a break, once the specified period has passed. -
Ability to Select Break Reasons
Lets employees choose break reasons whenever they take a break. -
Ability to View My Dashboard
Displays the “My Dashboard” option in the tracker.
Clicking this will navigate employees directly to their User Dashboard. -
Ability to Mark Away Time as Working Time
If an employee is idle for a certain period, a popup appears prompting them to select their working status.
Related Articles
User Level Configuration
Follow the steps below to access and modify user-level configurations under the Administration module: Step 1: Log in to your Time Champ account. From the left-hand menu, click on the Users module. Step 2: Click on the Edit option beside the name of ...How to Install Interactive Agent in MAC
Steps to Install Time Champ V3 Interactive Version in MAC System. Step 1: Log in to your Time Champ account using your credentials. Step 2: To install the application, click on “Download Agent.” Step 3: Select the operating system of your computer. ...Team Level Configuration
Follow the steps below to access and manage team-level configurations under the Administration module: Step 1: Log in to your Time Champ account. From the left-hand menu, click on the Administration module. Step 2: Under the Administration module, ...How to Install Interactive Agent in Windows
Step 1: Log in to your Time Champ account Step 2: Click on “Download Agent” to begin the installation process. Step 3: Choose the operating system of your computer (Windows). Step 4: Install Yourself – Select this option to install Time Champ on your ...How to Install Interactive Agent in Linux
Steps to Install Time Champ V3 Interactive Version in Linux System. Step 1: Log in to your Time Champ account using your credentials. Step 2: To install the application, click on “Download Agent.” Step 3: Select the operating system of your computer. ...