How to enable Notifications and Allow/Block Mails?
Follow the steps to navigate and configure notifications and mails
Step 1:
Log into the site by utilizing your username and password.
Step 1:
Log into the site by utilizing your username and password.
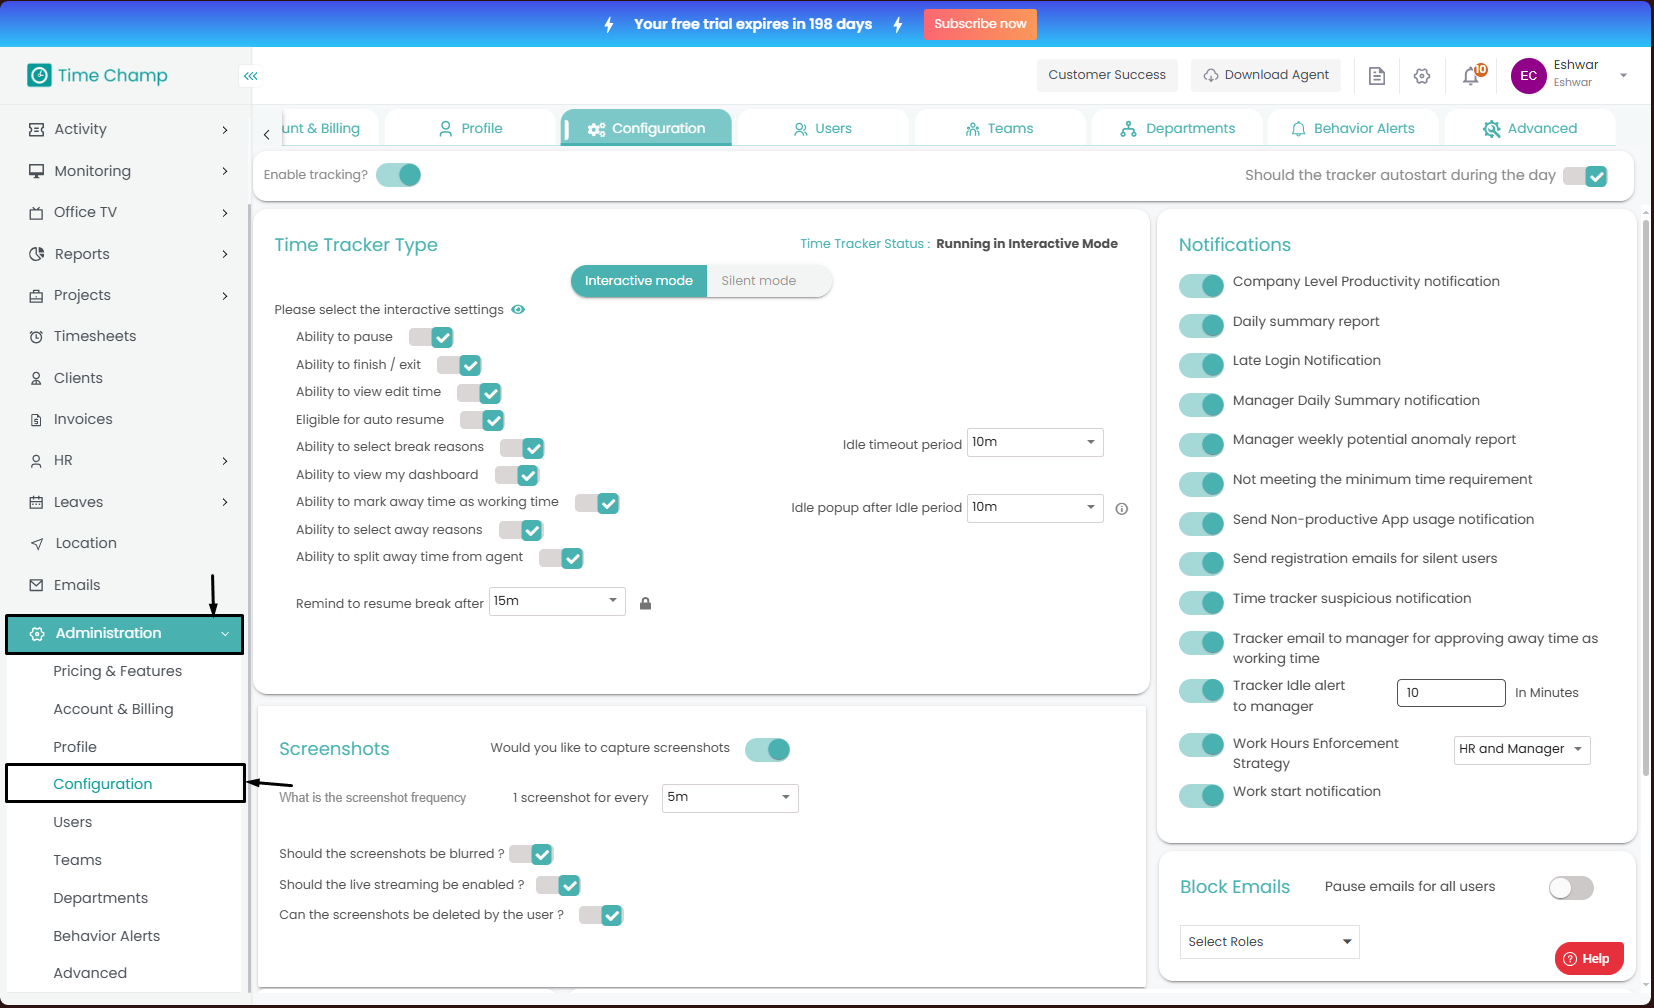
Step 2:
Navigate to the Administration Module and then to the Configurations section.
Navigate to the Administration Module and then to the Configurations section.
Step 3:
Now you can view the notifications in the highlighted area in the below image.
Now you can view the notifications in the highlighted area in the below image.
The following descriptions are for the notifications in the highlighted area in the above image.
- Send Non-productive App Usage Notification
Sends alerts when an employee uses non-productive apps, configured as per your organization policy. - Tracker Email to Manager for Approving Away Time as Working Time
Sends an email to the manager to approve an employee’s away time (e.g., meetings or client calls) as working hours. - Daily Summary Report
Sends a daily report summarizing employee time metrics, productivity, and working hours. - Not Meeting the Minimum Time Requirement
Sends a notification if an employee’s working hours fall short of the required minimum. - Late Login Notification
Notifies when an employee logs in later than the scheduled start time. - Manager Daily Summary Notification
Sends a daily summary to managers covering their team’s productivity and attendance. - Company-level Productivity Notification
Provides a company-wide summary of productivity regarding overall performance trends. - Time Tracker Suspicious Activity Notification
Notifies the manager if suspicious activity is detected, such as continuous pressing of a single key or placing weight on the keyboard/mouse to mimic activity. - Tracker Idle Alert to Manager
Alerts the manager through a notification when an employee’s system remains idle for a period configured by your organization policy. - Work Start Notification
Sends a notification when an employee begins their work on the system for the day. - Send Registration Emails to Silent Users
Sends an email notification to the silent configuration tracker user containing the site address and login credentials. - Work Hours Enforcement Strategy
Sends an email to the specified users and roles selected in the dropdown menu regarding work hour configurations.
Mail:
In the same configuration section, you can configure mails which is show in the highlighted area in the below image.
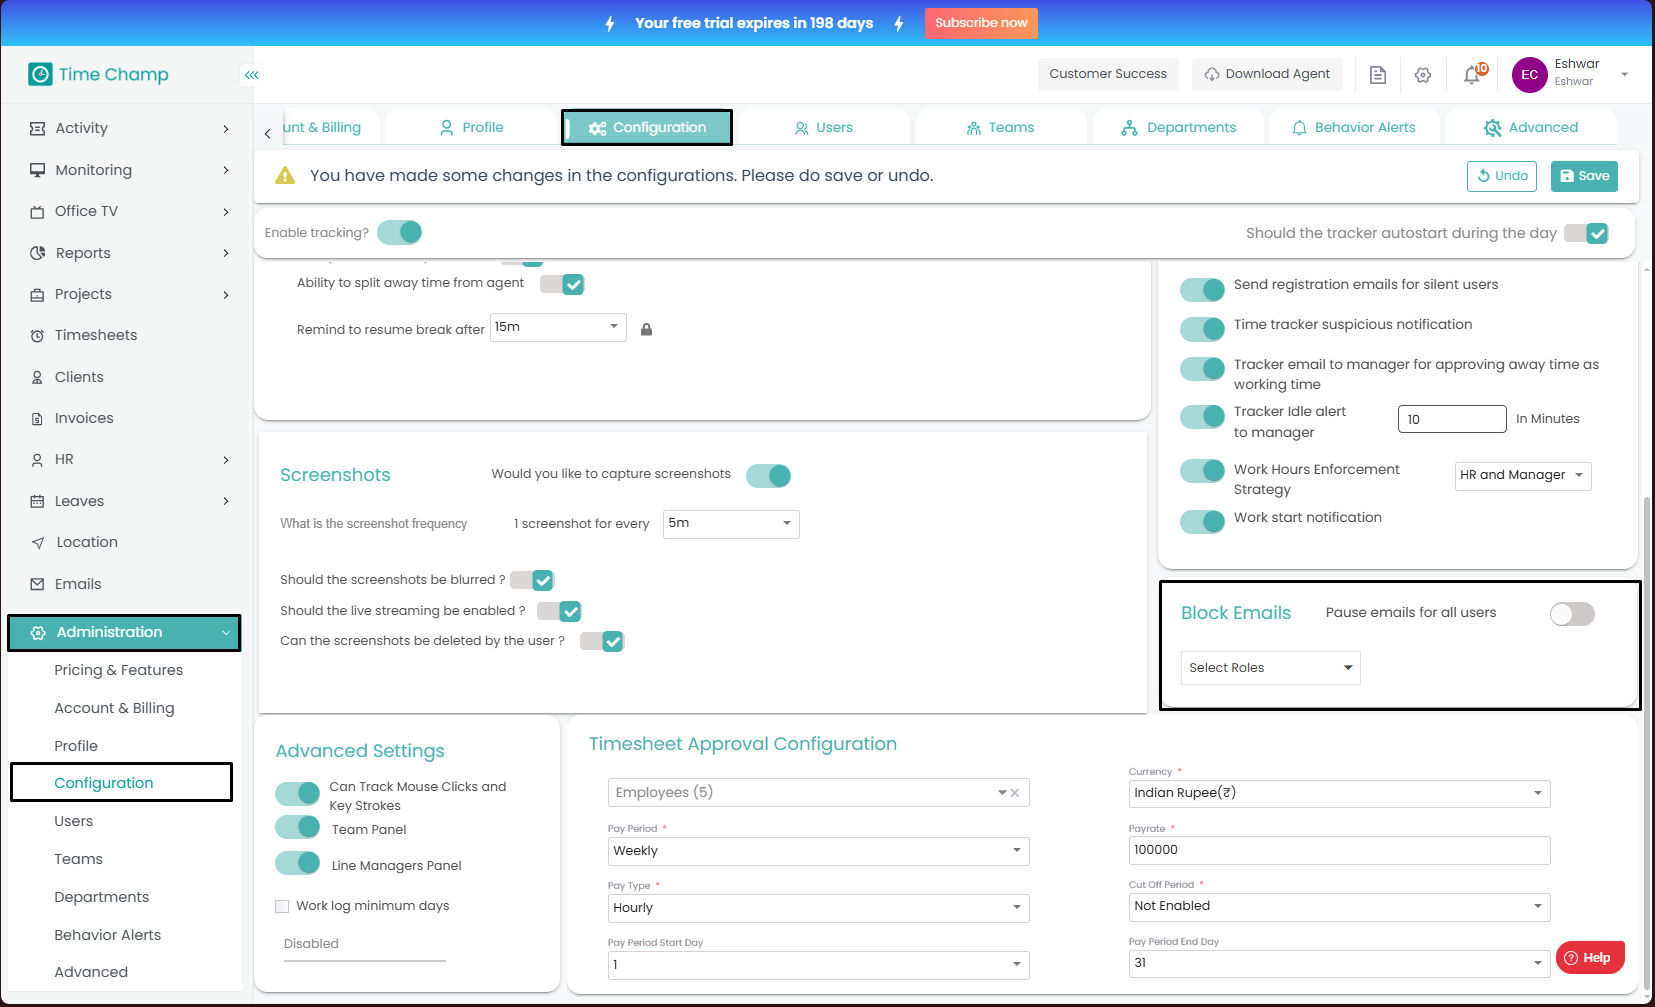
In the same configuration section, you can configure mails which is show in the highlighted area in the below image.
Enabling mail pausing for all users will stop any emails from being sent, ensuring that no mails are sent
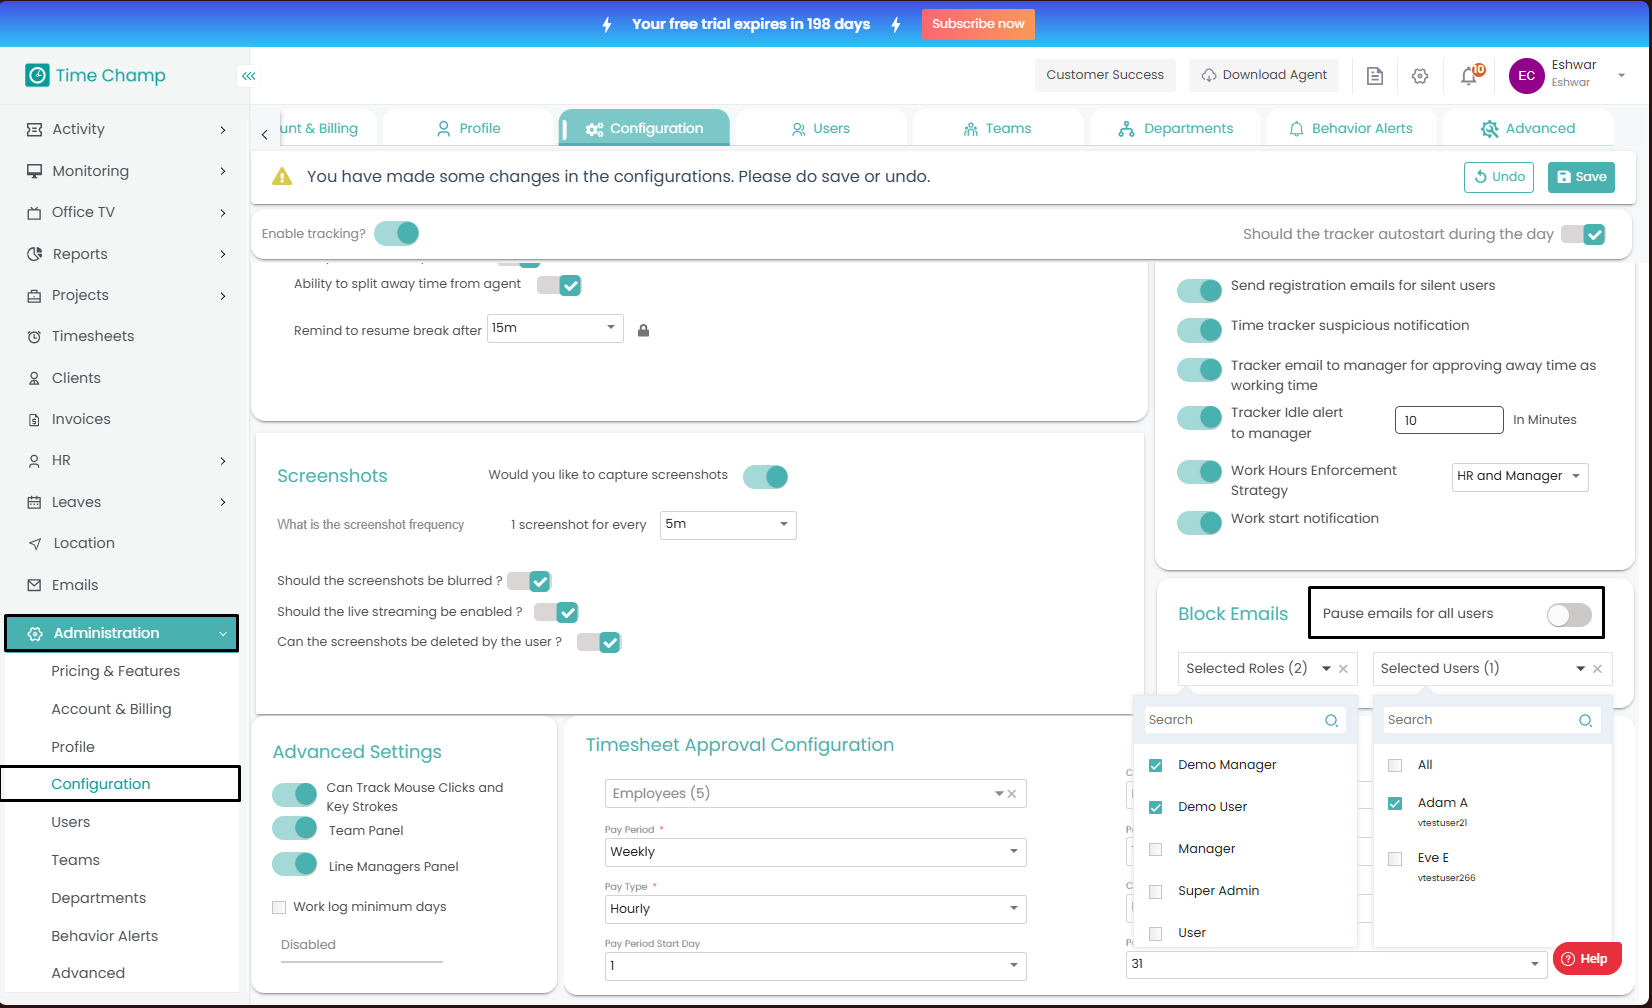
This feature can also be applied to specific roles. Within a chosen role, you can decide whether to pause emails for all employees or only for selected individuals, giving you flexibility in managing email delivery.
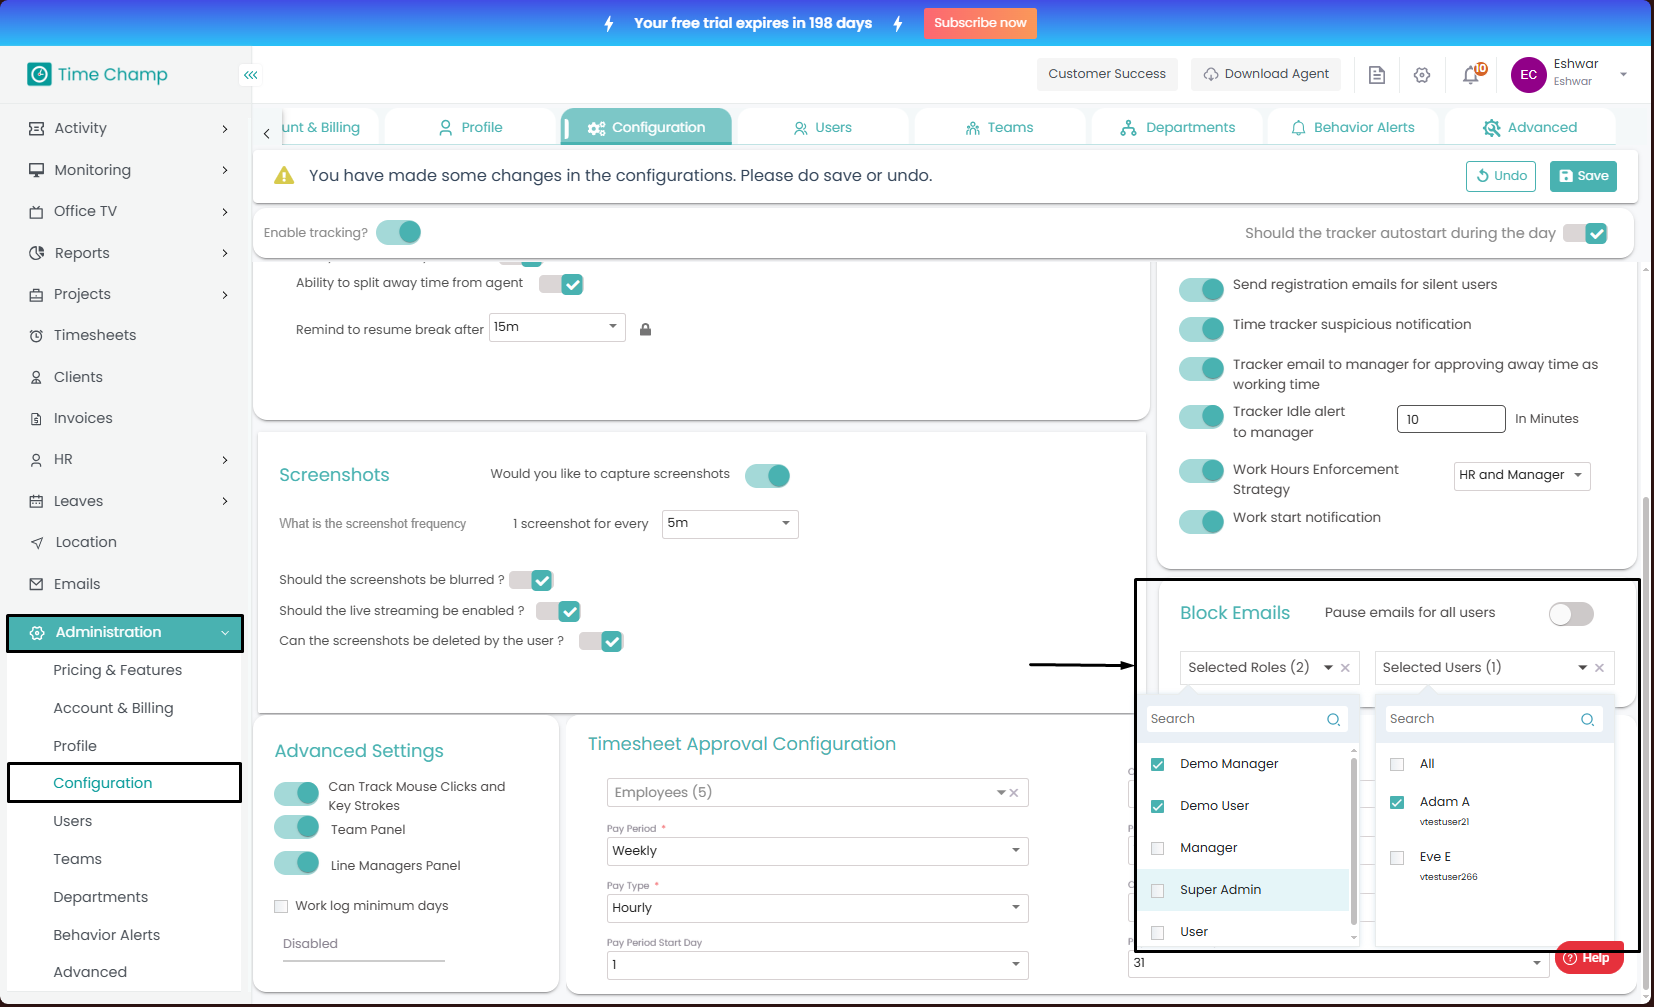
 Ensure that all modifications are saved upon completion; unsaved changes will not take effect.
Related Articles
How to enable Live Screens?
Follow the steps to Configure Live Screens. Step 1: Log into the site utilizing your credentials. Step 2: Navigate to the Administration module and then to the Configuration section. Step 3: The highlighted area in the below image is the option for ...How to Enable/Disable Keystrokes and Mouse Clicks Tracking?
Follow the steps to enable/disable keystrokes and mouse clicks tracking. Step 1: Log into the site utilizing your credentials. Step 2: Navigate to the Administration Module and then to the Configuration section. Step 3: Now you can toggle the ...How to enable Screen and Audio Recordings and Add Scheduling for Screen Recordings?
Follow the steps to configure Screen and Audio Recording. This article includes the procedure to enable screen recording (step 4a) and add screen recording Schedule (step 4b), enable audio recording (step 4e), editing (step 4c) and deleting (step 4d) ...How to reactivate/re-enable a Behavior alert?
Follow the steps to reactivate a behavior alert. Step 1: Log into the site utilizing your credentials. Step 2: Navigate to the Administration Module and then to the Behavior alerts section. Step 3: Click on the active button to select the inactive ...How to enable Screen Shots and Setup the Screen Shot frequency?
Follow the steps to configure screenshots Step 1: Log into the site utilizing your credentials. Step 2: Navigate to the Administration Module and then to the configuration section. Step 3: Now you can view the Screenshots options in the highlighted ...