Intune Setup on macOS and PKG Deployment
Intune user login on macOS
Step 1: Launch the Company Portal app on your macOS device.
Step 2: Enter your Intune account email and password, then click Sign In to complete authentication.
PKG Deployment
Step 3: In Microsoft Intune Admin Center, go to Apps → macOS.
Step 4: Click Create and choose macOS app (PKG) as the app type.
Step 5: Click Select app package file, browse to your PKG installer, and upload it.
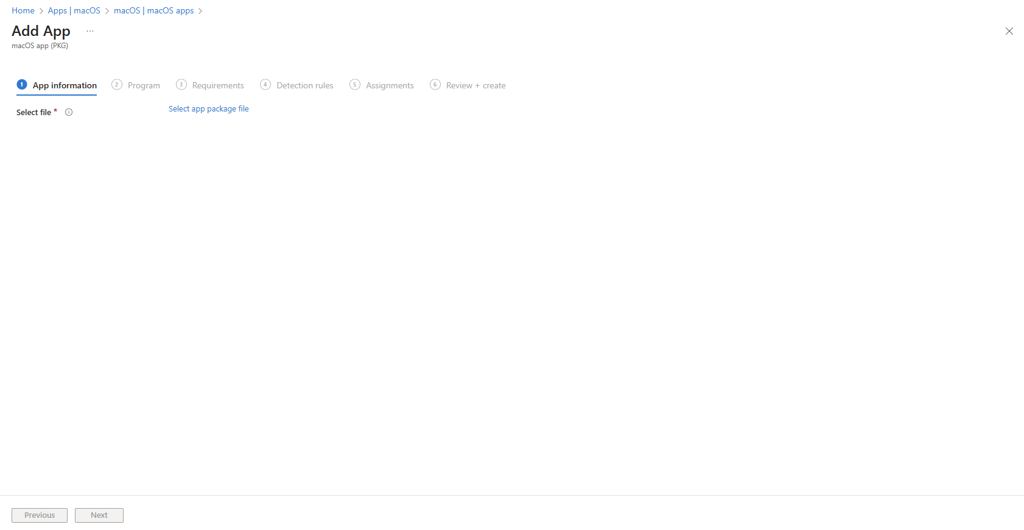
Step 6: After upload, click Save to confirm.
Step 7: Enter the App Name, Description, and Publisher details.
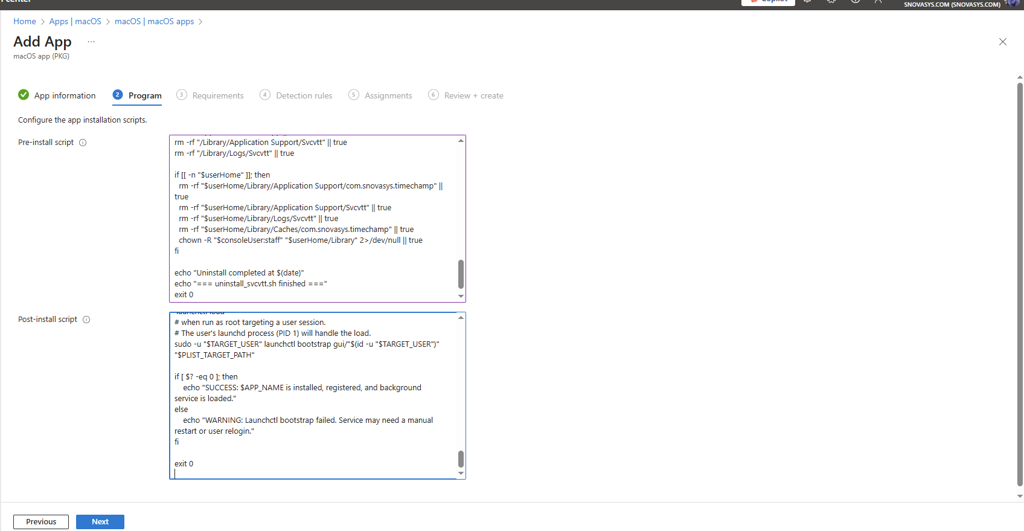
Provide the pre-install script
and post-install script, Click Next to proceed.
Pre-Install Script (Updated for SVCVTT)
#!/bin/bash
========= FINAL BULK UNINSTALLER =========
Removes: SVCVTT – Full Cleanup

APPS=(
"svcvtt"
"SVCVTT"
"Svcvtt"
)

echo "===== Starting Bulk Uninstallation ====="

for APP in "${APPS[@]}"; do
  echo "---- Removing $APP ----"

  # Stop & unload services
  launchctl bootout system "/Library/LaunchDaemons/com.snovasys.$APP.plist" 2>/dev/null
  launchctl bootout gui/501 "/Library/LaunchAgents/com.snovasys.$APP.plist" 2>/dev/null
  launchctl unload "/Library/LaunchDaemons/com.snovasys.$APP.plist" 2>/dev/null
  launchctl unload "/Library/LaunchAgents/com.snovasys.$APP.plist" 2>/dev/null

  # Remove LaunchAgents & Daemons
  rm -f "/Library/LaunchDaemons/com.snovasys.$APP.plist"
  rm -f "/Library/LaunchAgents/com.snovasys.$APP.plist"
  rm -f "$HOME/Library/LaunchAgents/com.snovasys.$APP.plist"

  # Remove login items (Persistent)
  /usr/bin/osascript -e "tell application \"System Events\" to delete every login item whose name is \"$APP\"" 2>/dev/null

  # Kill processes
  pkill -f "$APP" 2>/dev/null

  # Remove Application folders
  rm -rf "/Applications/$APP.app"
  rm -rf "$HOME/Applications/$APP.app"

  # Remove support files
  rm -rf "$HOME/Library/Application Support/$APP"
  rm -rf "$HOME/Library/Application Support/com.snovasys.$APP"
  rm -rf "$HOME/Library/Preferences/com.snovasys.$APP.plist"
  rm -rf "$HOME/Library/Caches/$APP"
  rm -rf "$HOME/Library/Logs/$APP"
  rm -f "$HOME/Library/LaunchAgents/com.svcvtt.agentplist"
  rm -f "/Library/LaunchAgents/com.svcvtt.agentplist"
  echo "✔ $APP Removed Successfully"
  echo "--------------------------------------------------------"
done

# Additional cleanup directories
rm -rf "$HOME/Library/Application Support/Snovasys"
rm -rf "/usr/local/bin/svcvtt"

echo "===== BULK UNINSTALLATION COMPLETED SUCCESSFULLY ====="
exit 0
Post-Install Script (Updated for SVCVTT)
#!/bin/bash
open -a "Svcvtt.app"
Step 11: From the Minimum Operating System dropdown, select the required macOS version.

Step 12: Click On the Detection rules page,
and click Next.

Step 13:
In Assignments, add the specific group to install the PKG on the devices in that group.

Step 14: The app was created successfully, as shown in the image below.

Add Policy to give the permissions
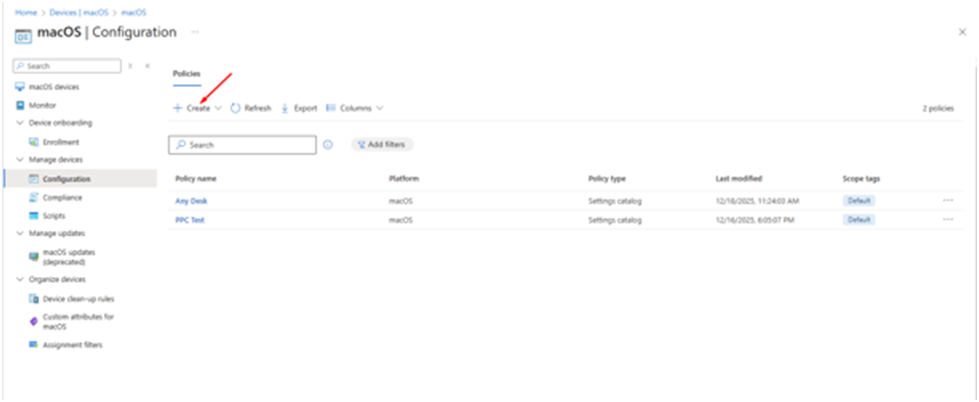
1. Click on Devices, and then select macOS as shown below.
2. Select the Configuration.

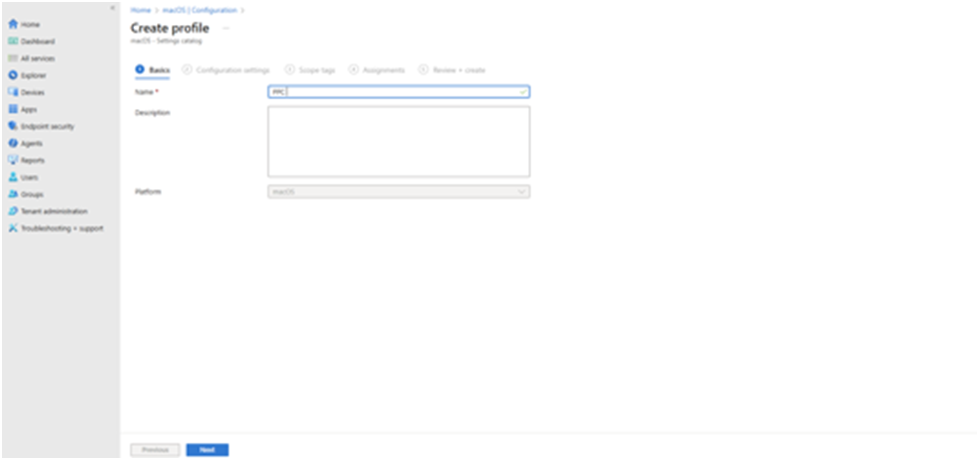
3. To create a new policy, select the Create option.
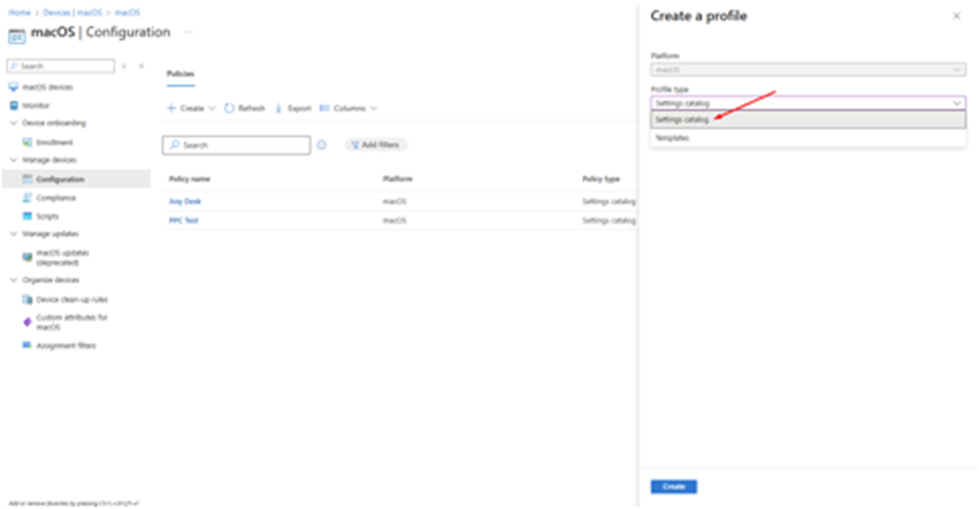
4. Then, select the Settings catalog.
5. Provide the Name.
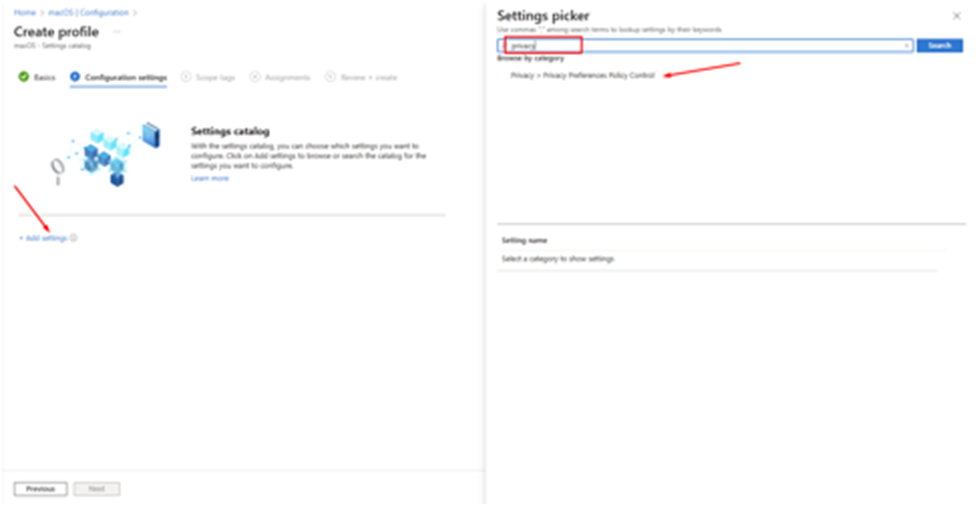
6. In Configuration settings, click Add settings, search for Privacy, and select Privacy Preferences Policy Control.
7. Under Services, expand the checkbox and assign the required permissions, including Accessibility, Screen Capture, and System Policy: All Files.
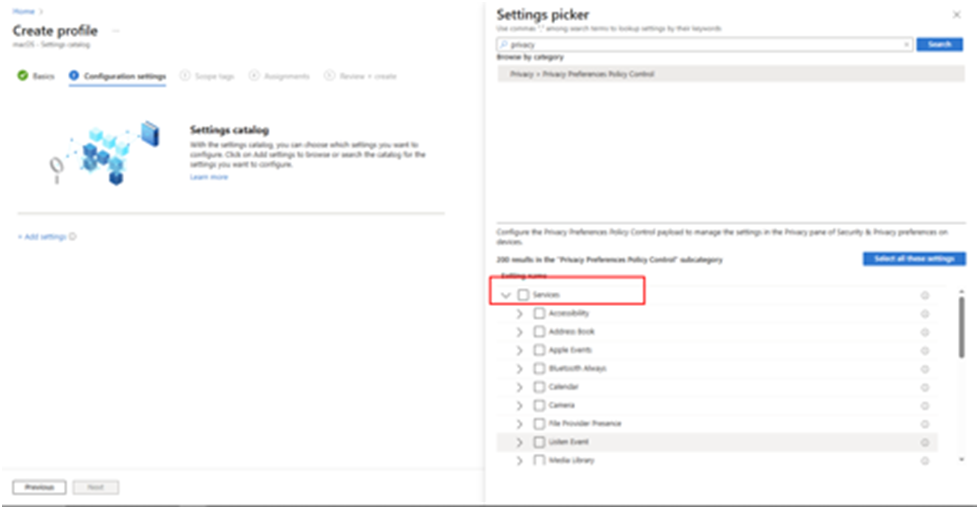
8. Refer to the image below to select the options.
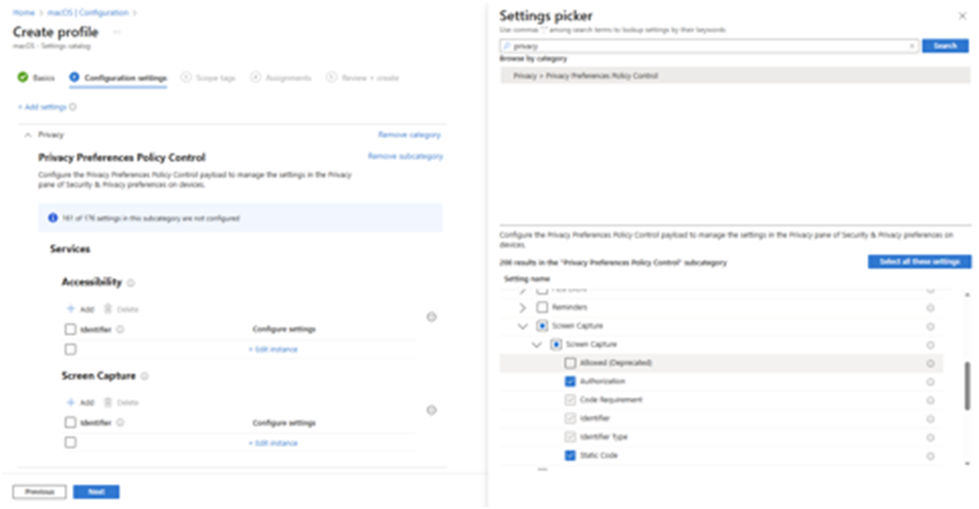

9. Select Edit instance to specify the Code requirement and Identifier. Please refer to the images below for input guidance. Each PKG file has its respective Code requirement and Identifier.
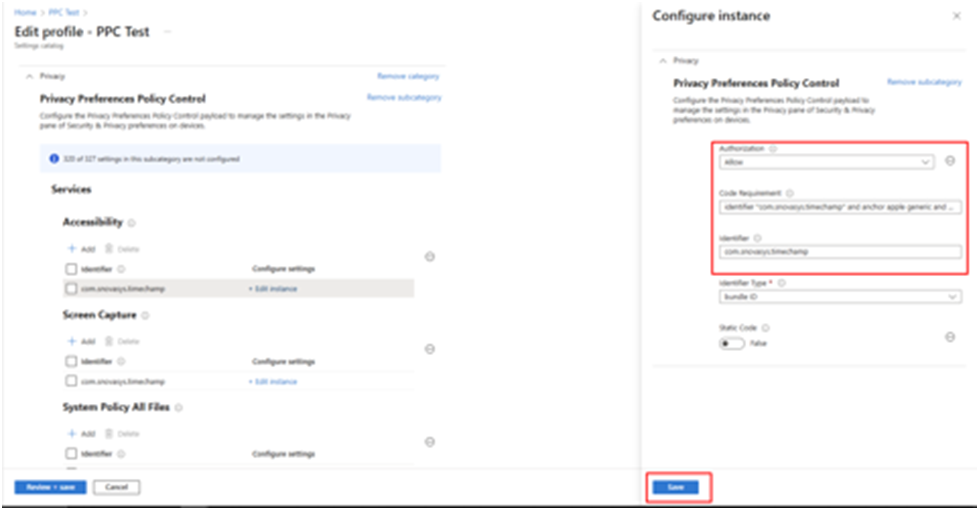
10. Refer to the image below for Screen Capture
11. Refer to the image below for System Policy All Files, and then click Review + Save.
11. Click Next on the Scope tags page.
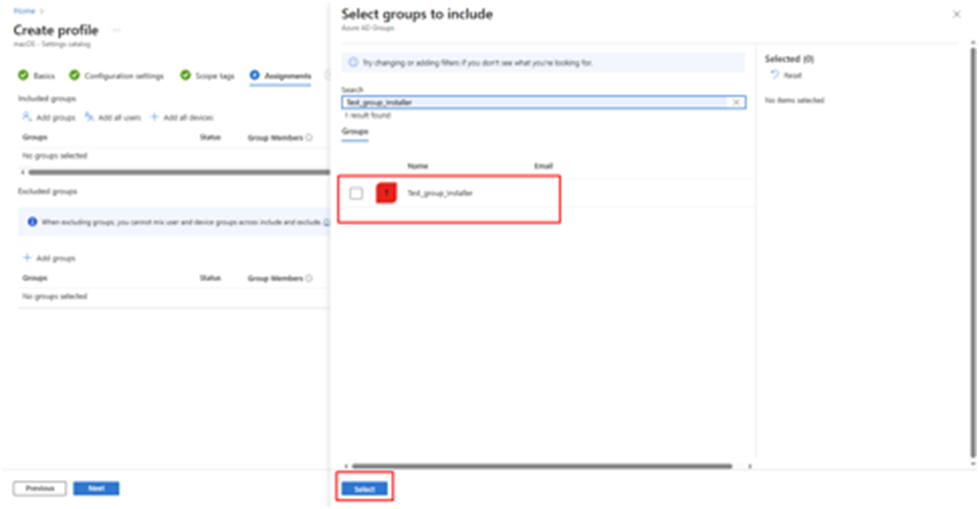
12. In Assignments, add the specific group to apply the policy to the devices in that group.
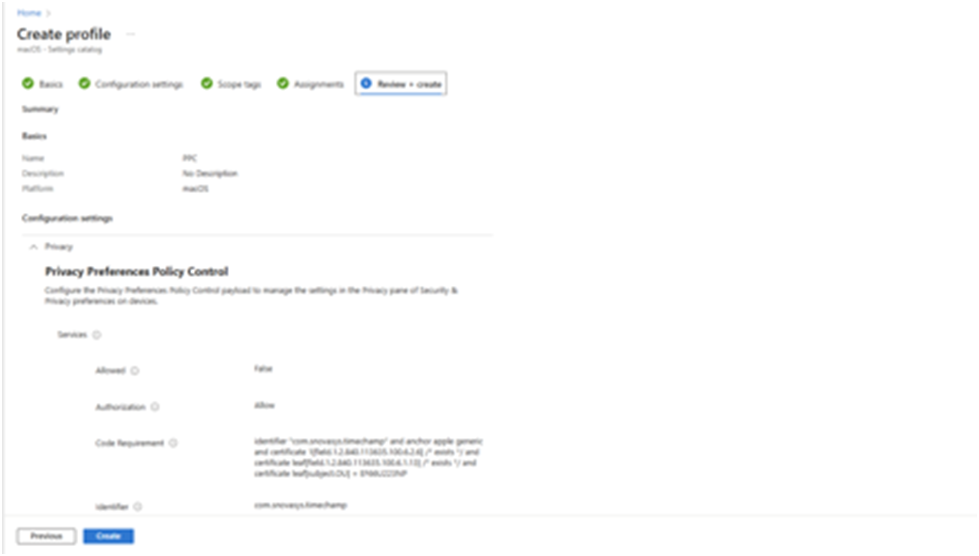
13. Review the profile, and then click Save.
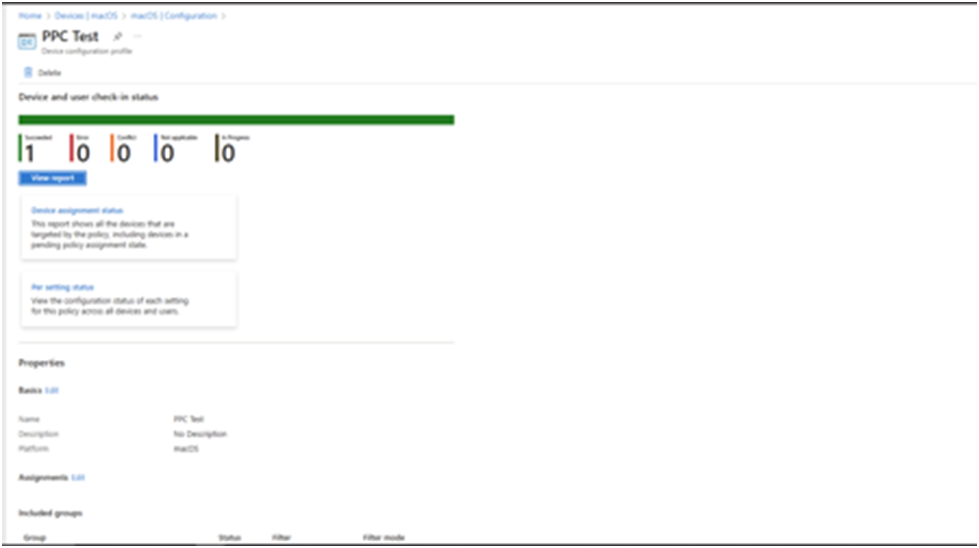
14. Intune may take some time to apply the policy on the device. You can then check the status to see if it succeeded or encountered an error.”
Related Articles
Pushing an Win app from Intune to a User's System - IT
Pushing an MSI to User Systems via Intune To deploy an MSI application to user systems using Microsoft Intune, follow the steps below: 1. Set Up Intune Admin System: Ensure Intune is properly configured and accessible from the administrator’s system. ...Linux Silent New Version Installation (Avalonia)
Time Champ Installation Guide for Linux Follow the steps below to ensure a clean and successful installation of the Time Champ application: Step 1: Check for Existing Installation Verify if a previous version of the Time Champ application is already ...Install Time Champ (MSI) Through Group Policy (GPO)
Creating a Shared Folder: 1) Create a shared network folder (this folder will contain the MSI package) For Example we are creating a folder named software in the C directory Right click and go to Properties of the shared folder. 2)Set permissions on ...